Building a New HTPC
So it’s been about a year and a half since I built my last computer. That one was a dual-purpose business and personal machine. It was a desktop, running Windows and Mac OS (a legit copy – it’s another story altogether as to how I got that to work). 8 gigs of memory, quad-core processor, 4 hard drives, a Blu-Ray burner, and 2 21.5†full-HD displays. Yeah, it’s pretty killer.
But now it was time to overhaul the 2.5-year-old home theater PC (HTPC). The old one still works fine, but it’s big, loud (it has 4 or 5 fans, which is way more than it needs, as it pretty much only sucks dust in anyway), and I wanted to upgrade the HD and add a Blu-Ray drive (the old one only had DVD, though I could play Blu-Ray rips at full HD). The parts were delivered early this week, so I built it mostly Monday and Tuesday. Here’s the part list:
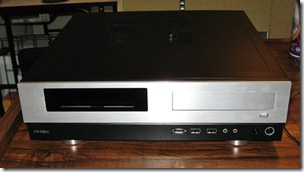
- Antec MicroFusion Remote 350 Micro ATX case
- Foxconn Cinema Premium AM3/AM2+/AM2 AMD 785G HDMI Micro ATX AMD Motherboard
- AMD Athlon 64 X2 4600+ Windsor 2.4GHz AM2 65W Dual-Core Processor ADO4600CSBOX (reused from old HTPC)
- Corsair 4GB (2 x 2GB) 240-Pin DDR2 SDRAM (PC2 6400) Memory (reused from old HTPC)
- Western Digital Caviar Black WD1001FALS 1TB 7200 RPM SATA 3.0Gb/s Hard Drive (reused from another PC)
- AVerMedia AVerTVHD Duet – PCTV Tuner (reused from old HTPC)
- LG UH10LS20 Blu-ray Disc Combo Internal SATA 10x SuperMulti Blue LightScribe
- Microsoft A9O-00007 WinXP Media Center Infrared Remote Control (reused from old HTPC)
- ADESSO WKB-4000US 2-Tone 88 Normal Keys RF Wireless Mini Keyboard (reused from old HTPC)
- CyberPower CP800AVR 800VA 450W UPS (reused from old HTPC)
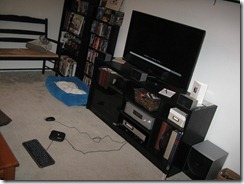 The largest impetus behind the rebuild is the fact that for my recent birthday I received a new 42†LCD TV. This was a huge step up from the 23†LCD computer monitor I had previously been using. While functionally the system was the same, this was a great opportunity to get a Blu-Ray drive in play and just revive the system a bit. Who doesn’t enjoy a good system refresh every year or two?
I put all the parts together last night, installed Windows, and began the process of reinstalling all my programs and settings. With one major exception, everything went together without any serious trouble, and it’s all good to go! So exciting to have a new system, and a good-looking one at that.
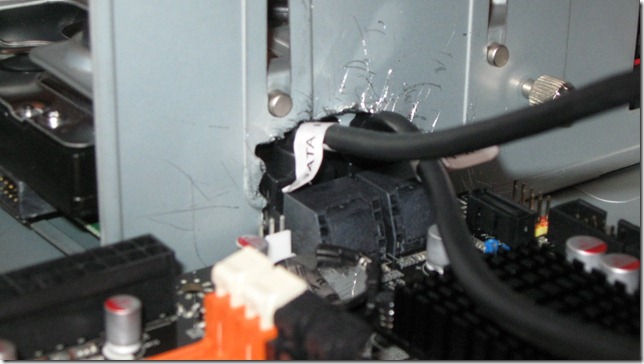
That “one major exception,†though, was brought on by an odd confluence of the tiny, small-allowance design of the case and an odd design choice by the motherboard manufacturer. As I discovered, the SATA ports on this mobo aren’t the typical top-down kind, that you plug the cable into vertically (perpendicular to the mobo). Instead, each pair was located in a small tower that turned them 90°, such that you plug into them horizontally (parallel to the mobo), from the back. The huge problem with this is that the case was designed such that there wasn’t even an eighth of an inch of clearance on the back side of the motherboard once installed, and so there was almost no space whatsoever to plug in a cable, certainly nowhere near as much as a cable needs.
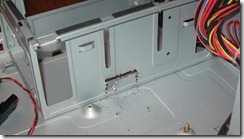 I ran to Fry’s and bought 90° SATA cables, to minimize the space required. Then, I tore the case down as far as it would go without popping rivets out, and took to cutting a hole in the interior wall in question. I realize this wasn’t the optimal way to go about it, but it was the best I could do with what I had handy. I took my drill and made a whole bunch of pilot holes – essentially a connect-the-dots pattern around the perimeter of the hole I wanted to create. Then, I took my tin snips and cut between these, opening it most of the way up. Next, I took my needle nose pliers and bent and twisted the piece back and forth until it snapped off at the bottom. Last, I used my bastard cut file and evened the cuts up a bit and smoothed them out as much as possible. The first time through, the hole wasn’t big enough. So I did all that again, widening the hole. This seemed to work.
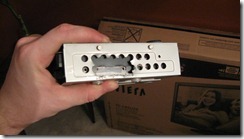 Then, I put the hard drive carrier back into the case (which unfortunately is located immediately on the other side of the wall I just hacked up). The side of the carrier nearly plugged my hole back up altogether, and now that problem had to be attacked. After checking to make sure there’d be enough clearance inside the carrier to cut a hole in the side and still have a hard drive in it without damaging it, I took to using the same process on a portion of the hard drive carrier (leaving out the first step of drilling because the carrier was designed with holes spaced across both sides). Finally, after cleaning all this up again, I put the carrier back in place, the motherboard, and connected the cables, and voila. It fit. Barely. It was still a tight fit, but at least I was no longer afraid I was going to break or damage something.
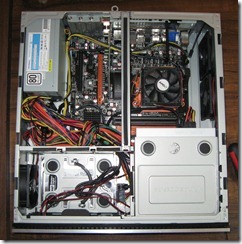 With that, I completed the rest of the installation. Unfortunately, that whole ordeal (including borrowing a drill from my dad due the recent death of my drill’s battery) wasted nearly three hours, so I didn’t get the power turned on until nearly midnight, and then I began the software portion of the setup process. So I went to bed around 3:00 that night, which was a wee bit later than I was planning.
Nonetheless, I now have a great-looking, great-performing new computer that will play DVDs, Blu-Rays, and any file-based media, as well as of course play and record broadcast TV (two channels at a time!) and any streamed internet programming.
Any questions or suggestions? Leave me a comment and I’ll respond!
